

Install a Windows printer for RAW label printing
When you print through a Windows printer queue on a LabelZoom print agent, the agent uses RAW printing — it sends your label commands (ZPL, EPL, DPL, TSPL, …) directly to the printer, and the printer’s firmware draws the label. It does not rasterize the label through a graphical Windows driver.
Because of that, the printer must be installed on the agent machine with a RAW pass-through driver. The simplest, most reliable choice on Windows is the built-in Generic / Text Only driver. This guide walks through installing it.
Before you start
Section titled “Before you start”- The printer is reachable from the machine running the LabelZoom print agent — over a USB cable, an LPT/parallel port, or the network.
- You know how it connects. USB printers usually appear as a
USB00xvirtual printer port; a parallel printer is onLPT1. For a network printer, have its IP address or hostname ready.
1. Open Printers & scanners
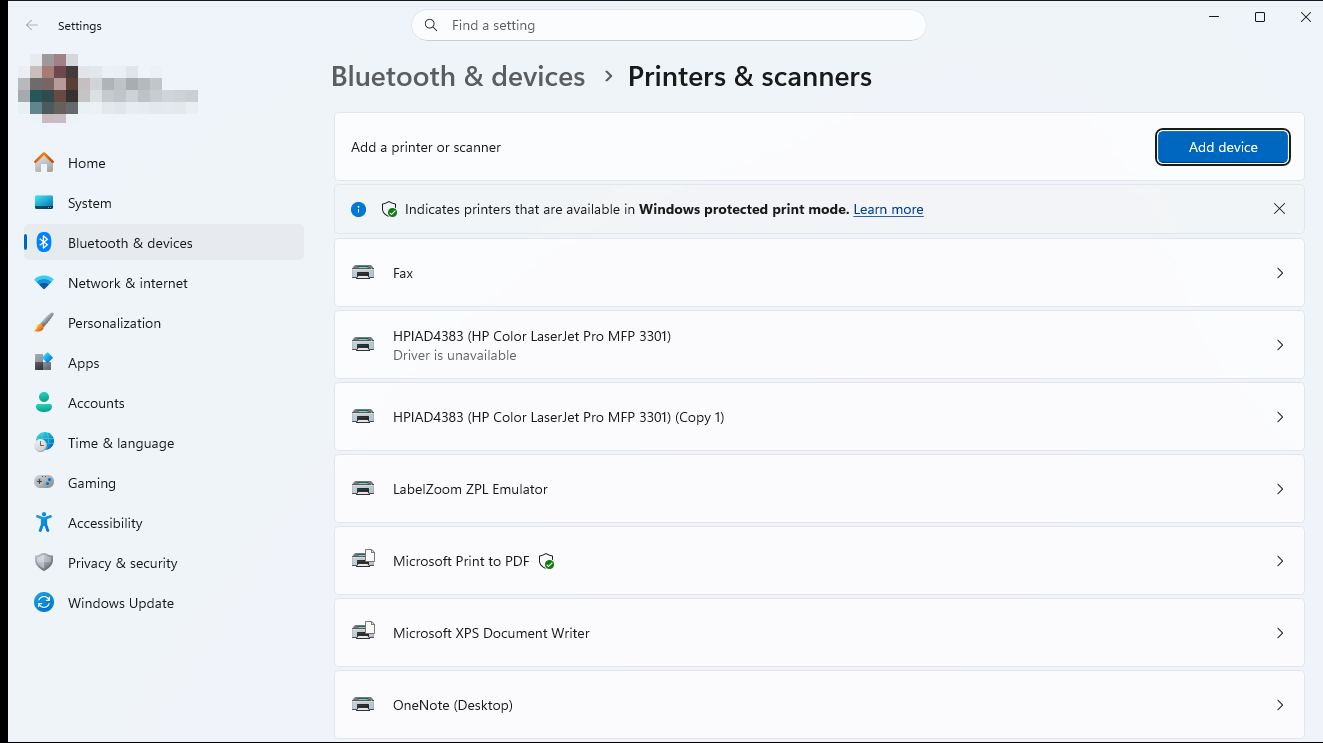
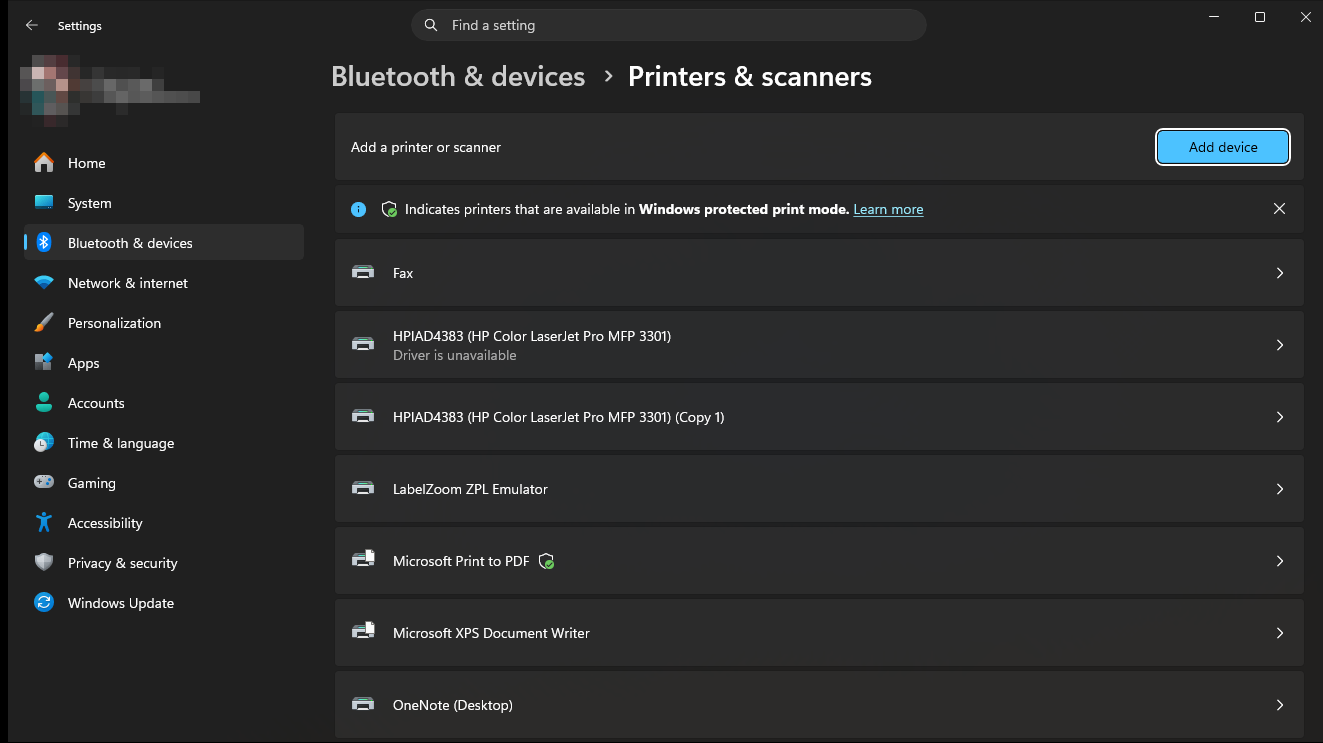
Section titled “1. Open Printers & scanners”Go to Settings → Bluetooth & devices → Printers & scanners (Windows 11), or Settings → Devices → Printers & scanners (Windows 10).
2. Add a printer manually
Section titled “2. Add a printer manually”Click Add device, wait for the scan, then choose Add manually (Windows 11) or The printer that I want isn’t listed (Windows 10).
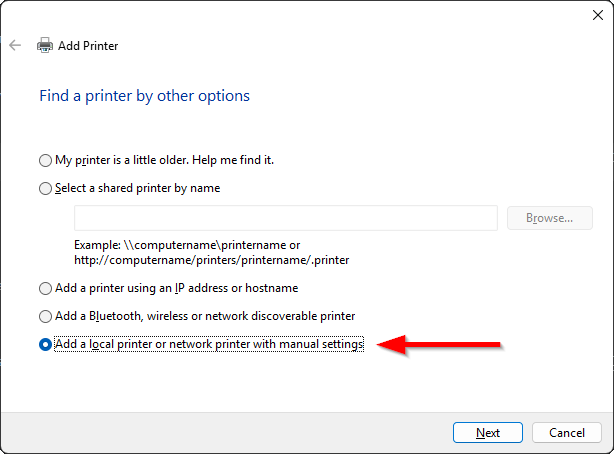
In the wizard, select Add a local printer or network printer with manual settings, then Next.
3. Choose the printer’s port
Section titled “3. Choose the printer’s port”Directly connected (USB or parallel)
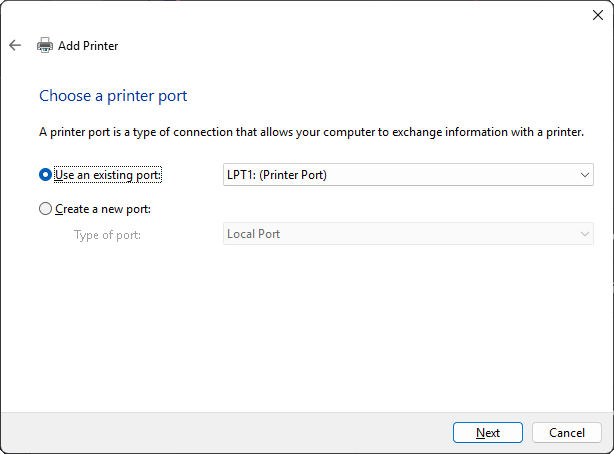
Section titled “Directly connected (USB or parallel)”Select Use an existing port and pick the port the printer is connected to:
- USB printer: the
USB00xentry (e.g.USB001). If several are listed, the one that appeared when you plugged the printer in is usually correct. - Parallel printer:
LPT1:.
Network connected (Ethernet or Wi-Fi)
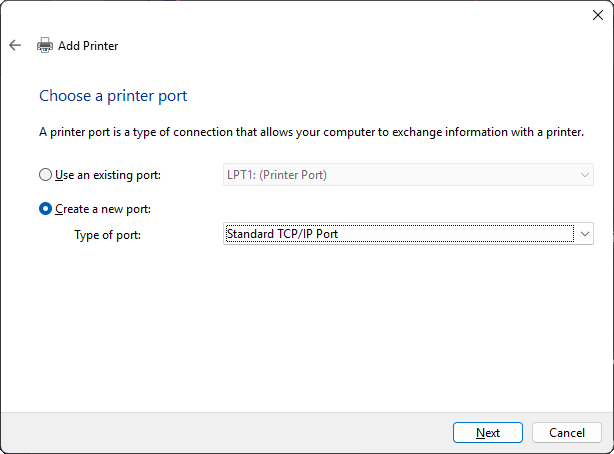
Section titled “Network connected (Ethernet or Wi-Fi)”Select Create a new port, then set Type of port to Standard TCP/IP Port. Click Next.
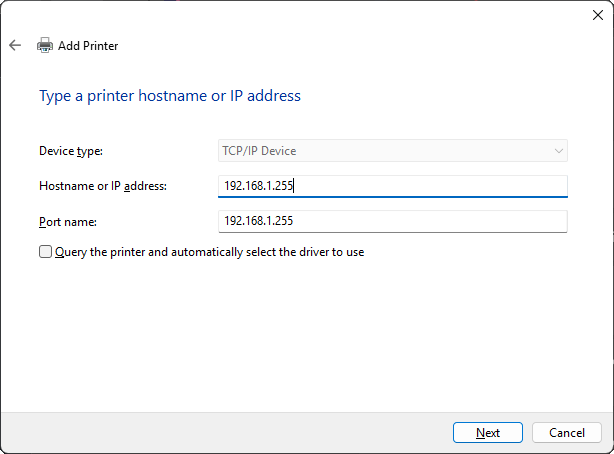
On the next screen, enter the printer’s IP address or hostname under Hostname or IP address. Clear Query the printer and automatically select the driver to use — leaving it checked lets Windows install a graphical vendor driver instead of the RAW one. Then click Next.
4. Select the Generic / Text Only driver
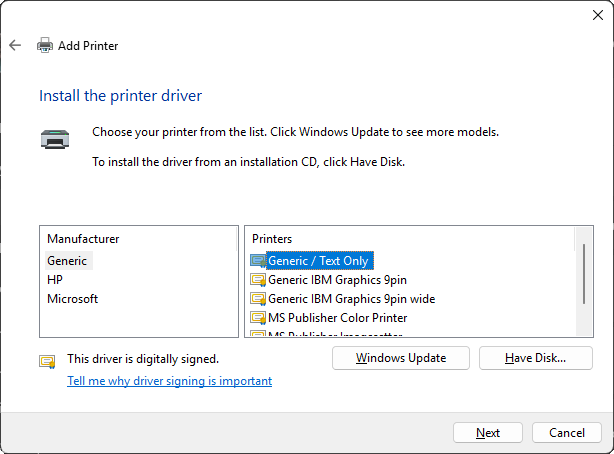
Section titled “4. Select the Generic / Text Only driver”When asked for the driver:
- Under Manufacturer, choose Generic.
- Under Printers, choose Generic / Text Only.
- Click Next. If prompted, keep the currently installed driver.
5. Name the printer
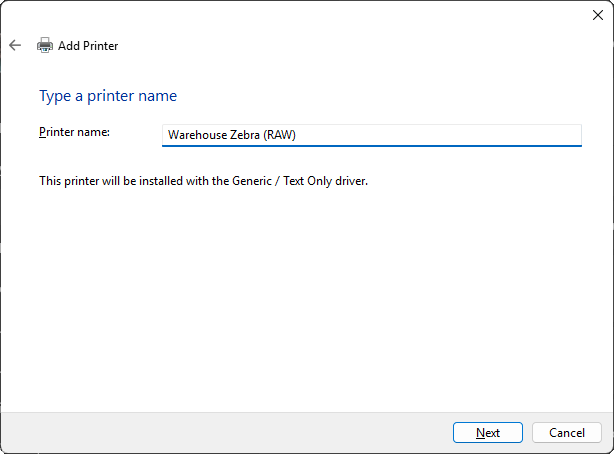
Section titled “5. Name the printer”Give the printer a clear name — for example Warehouse Zebra (RAW). Write this name down exactly:
it’s the value you enter in LabelZoom when adding a USB / Local printer.
Finish the wizard. You do not need to share the printer or set it as default. Skip the Windows test page (it prints a graphical page that a RAW label printer will not render correctly).
Add the printer in LabelZoom
Section titled “Add the printer in LabelZoom”- In the LabelZoom dashboard, open Printers and click Add printer on your agent.
- Choose USB / Local printer.
- Pick the printer from the list (the agent auto-detects installed printers), or type the exact name from step 5.
- Save, then use Test print to confirm a label comes out.
If the test label doesn’t print, see Troubleshooting below.
Troubleshooting
Section titled “Troubleshooting”- Nothing prints / the agent reports “could not open printer”. The printer name in LabelZoom must match the Windows printer name exactly (including capitalization and spaces). Re-check it in Printers & scanners.
- A blank or garbage label prints. The printer was likely installed with a graphical vendor driver. Repeat the steps above and select Generic / Text Only, or your printer’s dedicated RAW/ZPL driver.
- “The data is invalid” error. The printer’s driver rejected raw data. This happens with some vendor drivers (for example a v4 Zebra/ZDesigner driver installed automatically by Windows). Re-install the printer with the Generic / Text Only driver using the steps above, which reliably accepts RAW data.
- The printer isn’t in LabelZoom’s dropdown. Make sure the LabelZoom agent is running on the same machine and is enrolled, then click Refresh on the Printers page — the agent reports its installed printers on each check-in.